


The Ultimate Guide to Creating Coffee Labels
Coffee Labels: FDA Labeling Guidelines Made Simple
In creating your custom coffee labels, your brand identity is always the #1 priority. Your coffee story, from bean-to-cup, should be told well and ought to be highlighted by your packaging—it’s this big goal most business owners have, and the humble label is your greatest ally. It’s not an easy task and it requires research and effort, but successfully creating a coffee label that captures the essence of your brand secures you the mind and heart share of your target customers.

Not only is this a branding effort—correct labelling practices conclude in an enriching and educational experience for your customer. For the new coffee enthusiast, the harmonising of an exceptional coffee’s taste and aroma paired with great label design and content assures that all the facets of coffee and what it stands for is appreciated fully.
Your labels aren’t only aesthetic branding pieces that should make you look good—first and foremost they are “information sheets”. The efficient coffee label needs to provide your customers with relevant and accurate information. While “pretty” labels will get you noticed, *correct* labels are what sets well-built businesses apart from the impulsive, any-way-the-wind-blows rookie. We’ve seen it with our clients. Correctly-assembled coffee labels gets (and gets to keep) more customers.
If you already have a coffee label design, or are just starting with label concepts, it’s best to review the notes below so that you can also check if your labels are correct, and all information complete. If you’ve tried to reference the FDA Food Labeling Guide, you’ll know that all these “labelling requirements” and regulations jargon can get extremely confusing real fast. However, following the guide is key in making sure your custom confectionery labels make the cut, especially with discerning prospective customers. What to do?
[Tweet “Copy this simple guide that outlines coffee labelling regulations and certifications for your own custom coffee labels.”]
Keep in mind though that there are still exceptions and variations to the guidelines for specific product categories. When in doubt, check the full FDA Food Labeling Guide for complete details. You can simply annex the information based on what section it is that you need to clarify. Still saves you tons of time.
Let’s begin with outlining what content is required on your custom coffee labels. These are required by law if you’re selling your products in the USA.
CUSTOM COFFEE LABEL PANELS
LABEL PANELS:
There are 2 recognised areas—the Principal Display Panel or Primary Display Panel (PDP) and the Information Panel (IP). Both will of course correspond to your custom coffee label “artwork”, the term we use for files that go to print. The PDP and IP can be separate, front and back labels, or one large wraparound label, depending on what you feel will suit your coffee packaging style.
Primary Display Panel (PDP)
A.K.A. your front panel, or the main label that is meant to catch the attention of your customer
This is the first thing customers see if you’re selling these in retail. These would be the labels (or part of a large wraparound label if you aren’t printing two parts) that will be front-oriented to be displayed on store shelves.
WHAT TO INCLUDE HERE:
What your product is (formally known as the Statement of Identity) and how much of the product is in the packaging (your Net Quantity Statement).
Information Panel (IP)
A.K.A. the supplemental panel, which holds supporting information or elaboration on ingredients, people, and processes
For the IP, you’d want to place that to the right, left, rear, top, or bottom of the PDP, but primarily this would be on the immediate right. Place it elsewhere (left, rear, top, or bottom) if your packaging style makes it hard to place the IP on the right of your PDP. It’s important that you EXCLUDE any graphics or unnecessary art elements here. We want to be as clear and straightforward as we can with the presentation of information.
WHAT TO INCLUDE HERE:
Name + address of the coffee manufacturer (who created the formulation/roasted the coffee), the packer (who placed the coffee in its packaging), or distributor (who moves the coffee into stores or local shops where customers can purchase it)
If you’re the manufacturer and you are listed in the current directory or phone book, you can simply put city or town, state, ZIP (or mailing code if you’re outside the USA). If you aren’t listed, it’s required that you include your street address. However, if your assembly line also includes an outsourced packer and distributor, make sure to include their relation to your product (“roasted for”, or “packed by”, or “distributed by”).
Usually, the list of ingredients should also be seen on this panel; however, it the ingredients are less than two, it isn’t required as your Primary Display Panel would already state that your product is 100% coffee beans.
Make sure that all relevant info on your coffee label is easy to read. Legible fonts will be more consumer-friendly. Chances are, if your labels are hard to read and some information are concealed because of this, they won’t be buying your product. Good copy and branding should be supported by readable text styles and sizes. A good benchmark would be to make sure your smallest text is at least 1/16 inch in height. If you’re selling outside of the USA, accurately-translated text in the native language/s of where you are elsewhere selling is and investment you shouldn’t cut corners on.
Your custom labels must be printed on materials that do not contaminate your product. Our label stocks, soy-based inks, and acrylic adhesives are safe for food use—but it is best if your custom confectionery labels don’t touch your product, to make sure everything is kept sanitary and there are no outside contaminants.
*If you’re interested in the fine print, you can also check out General Requirements and Ingredient Lists on the FDA website.
Now that we’ve settled everything that needs to go on your PDP and IP, let’s move on to where and how this should all be placed on your custom coffee labels.
LABEL PLACEMENT:
WHERE ARE MY LABELING AREAS?
When looking at labelling areas on your packaging, exclude flaps, closures, shoulders, and necks—these are areas where text can get cut off. Take note that the area is determined by the total area available for labelling on the container, and not simply the size of the label applied on it. There are specific exceptions, and they’re listed as follows:
1) If you’ve got enough room, you can place all the required Information Panel (IP) content on your Primary Display Panel (PDP).
2) You can split the IP content into two Information Panels if you can’t make it fit into just one panel. If you’re doing this, make sure that the information in each section is kept together and not split up among the two panels.
3) If you’re really tight on space and have LESS THAN 12 in² (77.42cm²) for your labelling area, you can just put a phone number or address and point the customer to these contact details for any further information It’s the same rule for containers that are unusually-shaped and because of this don’t have a sufficient labelling area.
DESIGN:
HOW SHOULD TYPE (TEXT) LOOK LIKE FOR MY INFORMATION PANEL CONTENT?
1) Regardless of your chosen font, your text must be at least 1/16 inch (1.6mm) tall. This is based on the lowercase letter o (or uppercase O if using all uppercase letters).
2) Keep it proportionate. The height of letters can’t be more than 3 times their width.
3) All required information should be easy to read. High contrast (such as black text on white background) is key.
4) Working with a brand identity that focuses on (foreign) culture? When using a foreign language anywhere on your packaging, check that all required information is in both English as well as the foreign language that is applicable.
5) You can pull of your aesthetic concept, but it shouldn’t be too far of from what your product is. Your coffee label artwork shouldn’t be misleading (false advertising, in a sense) and shouldn’t take away from the visibility of the required information.
DESIGN:
WHAT LABEL ELEMENTS CAN I INCLUDE?
Certain coffee label elements can only be included in your design if conditions are met. Take a look below and see if there is anything that you might have missed to properly feature your coffees.
PREMIUM QUALITY
To qualify for this, your coffee beans should have been inspected and graded before they are roasted. This is done by inspection authorities who bestows a certificate if all criteria are met.
![]()
UTZ
A certification that recognises sustainably grown coffee. Factors include soil erosion prevention, habitat protection, and other criteria.
USDA ORGANIC
This badge affirms that the land upon which the coffee is grown is farmed with renewable resources and that synthetic substances and GMOs haven’t been used.

FAIR TRADE
This badge recognises sustainable land cultivation, no use of GMO, pesticides and fertilisers, and accordance of fair wages to farmers.
RAINFOREST ALLIANCE
This badge identifies coffee grown in the canopy shade amidst a sustainable ecosystem, no use of GMO, pesticides and fertilisers, and accordance of fair wages to farmers.
![]()
BIRD FRIENDLY/SHADE GROWN
Certified by the Smithsonian Migratory Bird Center, this badge recognises organic and eco-friendly practices for coffee grown in a rich environment under a rainforest’s canopy shade.

DIRECT TRADE
Linked to Fair Trade, this badge identifies a direct, harmonious relationship with roasters and farmers and their fair trade with fair prices.

SINGLE ORIGIN
As the name suggests, coffee beans come from a specific region (farm, country) and also refers to various beans coming from a single location.

REGION
This identifies the region of origin of the coffee beans (such as Sumatra or Java).

ALTITUDE
Due to coffee beans flourishing better when grown in higher places, you could include this badge to showcase the high quality of your beans. Higher plantation, better taste.

ROAST DATE
This confirms whether the beans are freshly roasted or not—great for coffee lovers who value a great cup of coffee.

LIGHT ROAST
No oil present on the surface, lighter color and flavor, pronounced acidity. Most of the caffeine from the beans is retained. Example: Cinnamon Roast.
MEDIUM ROAST
Little or no oil present, the color of milk chocolate, fuller in body. A more balanced flavor and acidity. Examples: City Roast, American Roast.

DARK ROAST
Darker color, almost black, with substantial amount of oil. Rich, bitter, maybe even burnt flavor, low acidity. Examples: French Roast, Italian Roast, Espresso Roast, etc.
FOOD NAME
A.K.A. “Statement of Identity” which can be either the “common name” or a “fanciful name” of your coffee product.
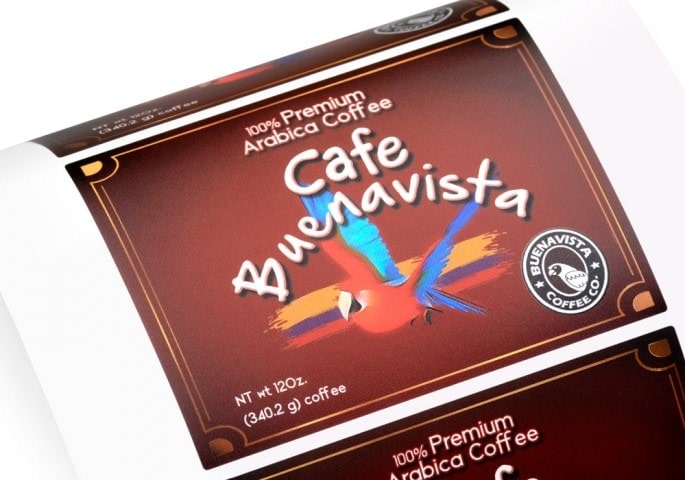
When printing custom coffee labels, this is obviously the first thing that you would have already been set on, even before your brand name. This is the name of what you are selling; and if you’re using a fanciful name (“Wake Me Up”, which is a type of strong blend, for example) make sure this is accompanied by a descriptive phrase at least 1⁄2 the type size of the product name so that your customers can identify right away what the product is (“100% Arabica Coffee).
When selling a flavored product, let them know that it isn’t a naturally-occuring flavor. For example, say “whiskey flavored coffee”. And, more importantly, if your flavoring isn’t derived from a natural source, then your custom label should say so. In this case, “artificially flavored hazelnut coffee”.
If applicable, your food name should also describe the form to correctly identify what you are offering. Examples would be “100% whole bean coffee” or “decaf ground coffee”.
RESPONSIBLE FIRM
A.K.A. you, and everybody else who made the production, packaging, and distribution of your coffee product possible
We tackled this a bit in the Information Panel (IP) section above. To iterate, this ID on your coffee label is part of your production and supply chain. This can simply include your roaster, a company that packages your products, or mainlines that are authorised to sell your coffees.
On your custom label, add the firm (manufacturer, packer, distributor) to help customers identify the responsible party/parties. This not only gives your customer confidence that they are purchasing quality coffee from a legitimate source, it also is required by law if any food spoilage or complaints arise.
Unless you are the actual manufacturer, other companies that will help you produce and sell your product should be included and must have a qualifying phrase that lets the customer know what their relation is with your brand. For example, “manufactured by Best Brew Bros” or “roasted fresh everyday by Hey Coffee Roasters” would have “exclusively distributed by Wholefoods Organic Market” if you aren’t selling anywhere else.
Any firm that you are using, even if they are a small business or an organisation, should also have its city, state, and zip code declared on your custom coffee labels. If the firm is not listed in the current telephone guide for that city, it’s best that the street address is also listed.
NET QUANTITY
A.K.A. how much your coffee weighs, minus the bag or bottle of course!
The net quantity is the declaration of the specific amount of product, stated in both US (inches/pounds/fluid ounces) and metric (grams/liters) units, and can come in many forms:
– Net weight (drained weight, if applicable)
– Volume
– Count
The correct format would then be, for example: Net Wt. 8 oz. (226 g). For coffee, even if you can count the beans, obviously you shouldn’t go through the trouble! Would be pretty crazy to specify count, as in: 306 coffee beans. Up all night drinking coffee?
Not sure how to set the size of your text for this?
Here’s a quick formula:
area of the PDP (width x height if rectangular or square; or 40% of product height x circumference if cylindrical)
Keep in mind that the required type must follow the Type Specifications in the Information Panel (IP) content and be at least the smallest size permitted based on the Primary Display Panel PDP) area:
If your PDP area is:
≤ 5 in² (32.26cm²)
> 5 in² (32.26cm²) but ≤ 25 in² (161.29cm²)
> 25 in² (161.29cm²) but ≤ 100 in² (645.16cm²)
> 100 in² (645.16cm²) but ≤ 400 in² (2,580.6cm²)
> 400 in² (2,580.6cm²)
Then your minimum type size is:
1/16 in (1.6mm)
1/8 in (3.2mm)
3/16 in (4.8mm)
1/4 in (6.4mm)
1/2 in (12.7mm)
PRODUCT DATES / LOT CODES
A.K.A. make the product, check the product, tag the product
This dating info gives your perishables a set standard for tracking and tagging. This is optional for most food products and can either be specified as “open dating” or “lot coding”.
“lot coding” helps you check and remove your products from retailers in the event that a certain batch of coffee isn’t up to par and must be recalled. This is in the short form of either numerals. symbols, or alphanumerical codes, and this helps you contain an otherwise large set of information (production date, time of packaging, who delivered your products to where, and so on).
“open dating” is suggested for all foods that spoil easily and helps your customer enjoy your coffee offerings in the time frame when it is in its best condition. Noted as either in text (e.g. Sept 29) or numbers (09-29), this includes “pull date”, “quality assurance or freshness date”, “pack date” and “expiration date.” You would indicate pull date, quality assurance date, or pack date on labels to inform your retailers and consumers when the coffee product was made or how long the coffee product should be offered for sale to ensure optimum quality. The expiration date tells your customer until when your product should spoil and when it can be consumed safely.
NUTRITION FACTS
A.K.A. what happens when I drink coffee?
Coffee isn’t only comforting, decadent, and delicious—it’s something that’s also being touted for its health benefits. Many coffee producers highlight the healthful effects of coffee. A “health claim” is exactly that—it’s a food label message that describes the relationship between a food component, such as fat, calcium, or fiber, and a disease or health-related condition. FDA has approved various health claims based on extensive scientific evidence and defined conditions under which the claims can be used (e.g., sodium and hypertensionn, calcium and osteoporosis).
Nutrient Content Claim indicates the nutritional value of the food. Health Claim describes the relationship between a food component and a disease or health-related condition. Take note that no nutrition claims can be made if no nutrition labelling is present, regardless of exemptions.
*If you’re interested in the fine print, you can also check out Nutrition Content Claims on the FDA website.
PLEASE NOTE that this post does not constitute professional advice nor does it substitute for your reading and reviewing the applicable language from the FDA regulations or obtaining advice from the appropriate professional regarding what is and is not required by the FDA regulations. The reader of this article/blog is urged to read the FDA regulations and/or obtain the appropriate professional advice on the FDA regulations.


