How to Create Print-Ready Designs In Canva
How to Create Print-Ready Label Designs In Canva
Canva is a free online design tool that is extremely simple to use and produces incredible results for design DIY. We have put up a guide to show you how to use Canva to create files ready for printing.
Finding an inexpensive graphic designer when you’re just starting your business and working with a restricted budget may seem hard. Fortunately, there are many fantastic and reasonably priced freelance designers available online, or you may use free design software. Canva is a great option.
Here are the steps to show you how to create print-ready label designs in Canva:
1. Create your Design
After signing in to Canva, click on “Create a design” in the top left corner and fill in your custom dimensions.
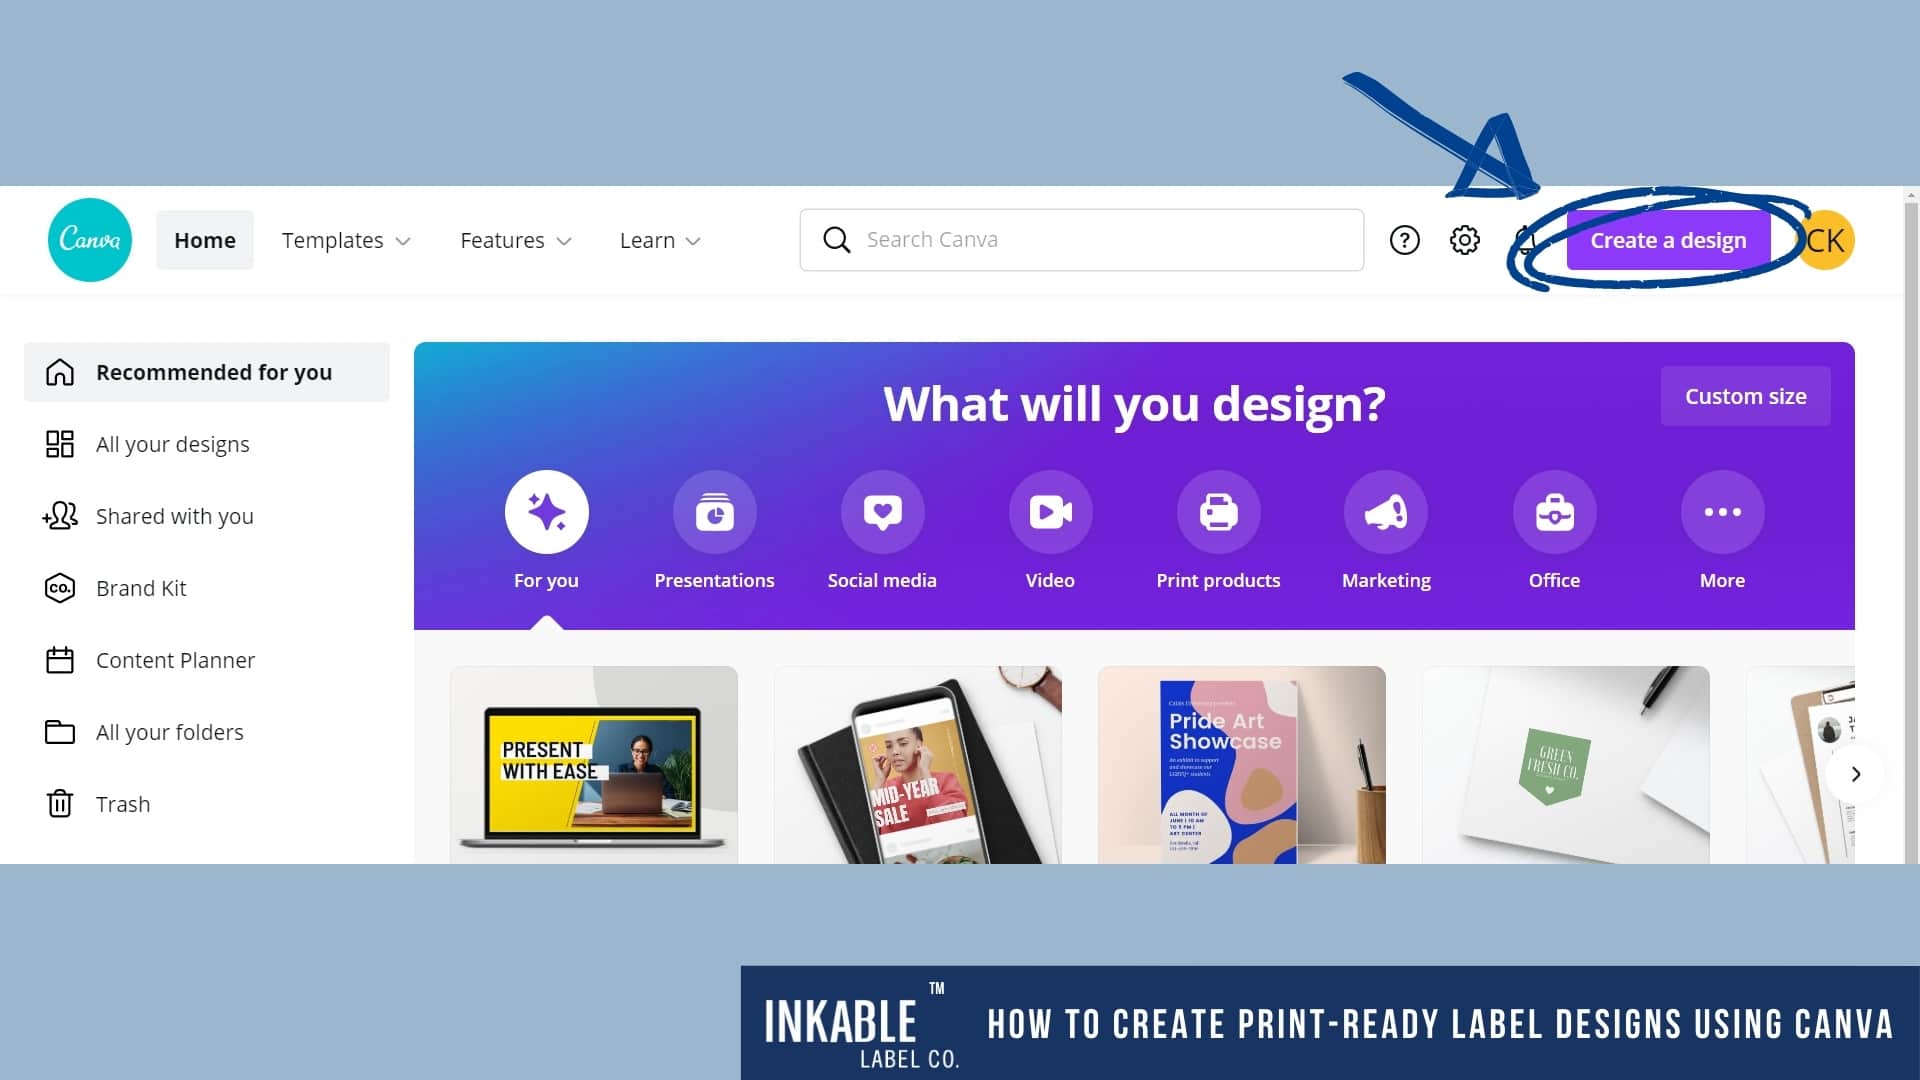
You can specify the size you want in centimeters, millimeters, inches, or pixels. To avoid any guesswork, you can use an online converter.

When designing a great label design, it is crucial to scale your artwork according to the final size. By using the finished size, you are sure that the spacing on your layout is just right, and you don’t need to adjust any art elements afterward.
2. Set up Your Margins and Bleed Area
Before you start creating your design, we suggest that you check the print bleed setting.
This feature allows you to see the objects that are moving off the page. In the upper left corner of your screen, select “File,” then click on “Show print bleed” from the dropdown menu.
All objects and colors that reach the edge of the page require bleed lines.
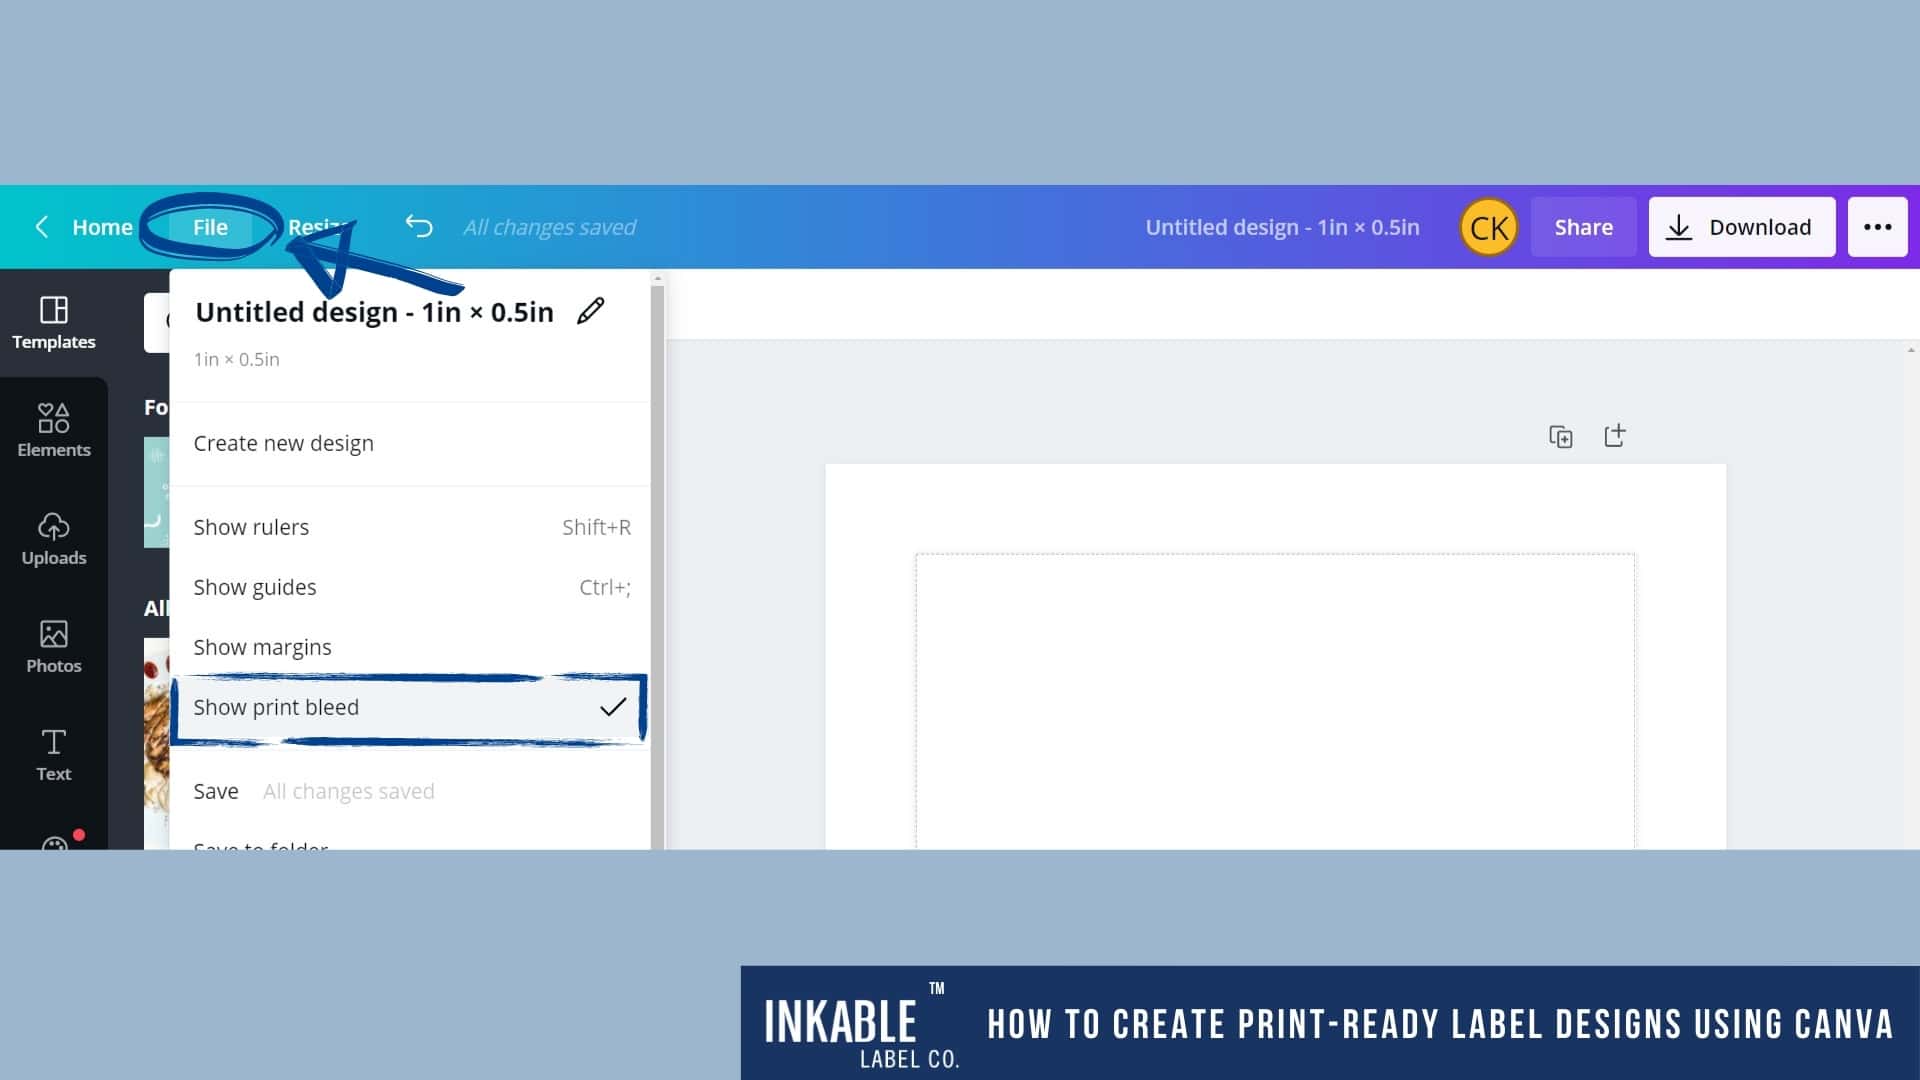
Due to the apparent possibility of a shift on the machine while cutting, ensure the images extend beyond the bleed line. By doing this, your page does not have a white stripe along the side.
3. Use High-Resolution Images
If you are creating a product label that requires a nutrition facts panel or a supplement, you will need to import it into Canva.
Before doing so, ensure the file is set to a high resolution. Although 800dpi is preferred, 300dpi would suffice.
To do that, select “Properties” on your PC or “Get Info” if you are using a Mac from the drop down menu after right-clicking the picture you wish to use. A new window will open for you.

The new window will contain actions to help you find the actual resolution and size of your file. To verify the image’s resolution and other information, go to the “Details” page on your PC and “More Info” on your Mac.
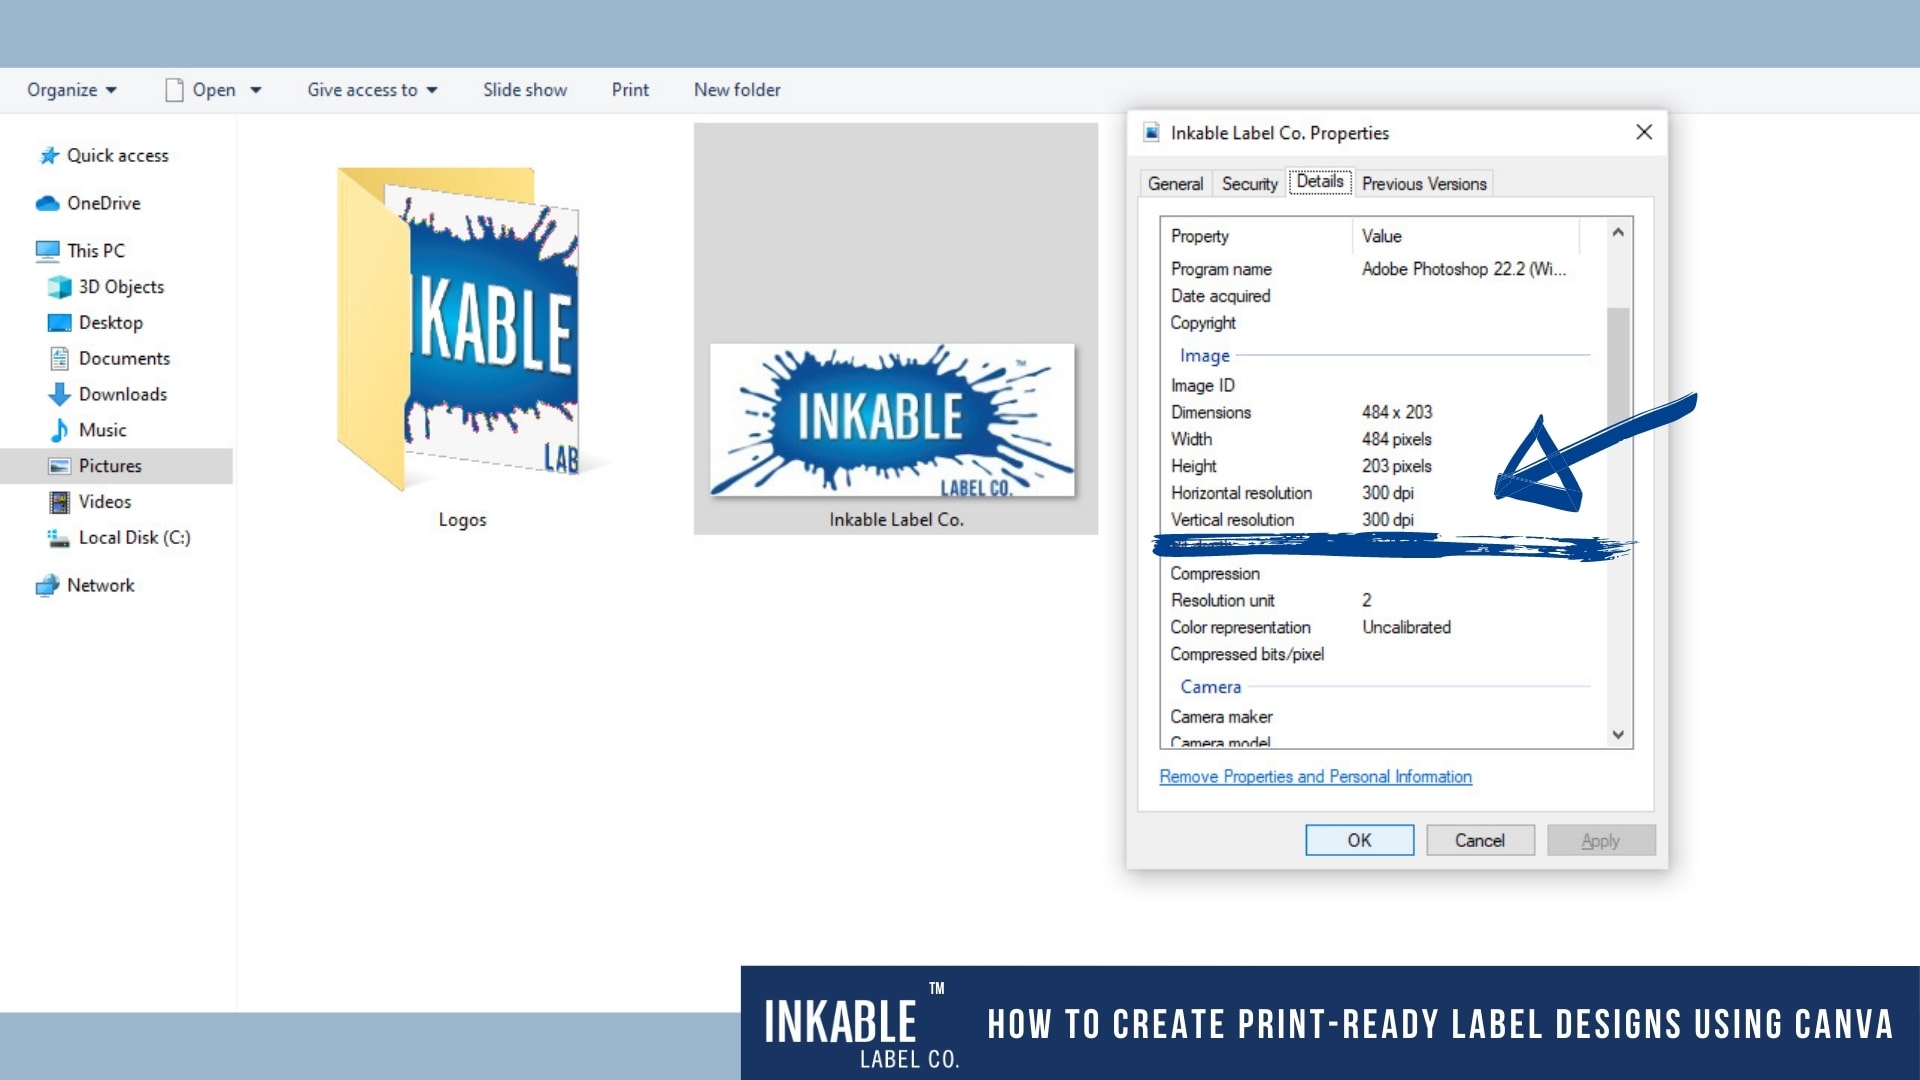
As you can see above, this will show you the exact size and dpi of your file. Larger proportions typically generate higher resolution images, so you won’t lose any detail if you have to scale something down to fit on your label.
4. Convert Your Design to CMYK
CMYK is the color language that all presses understand.
The designs are generated in RGB color mode because Canva is an online software application, but we print in CMYK color mode.
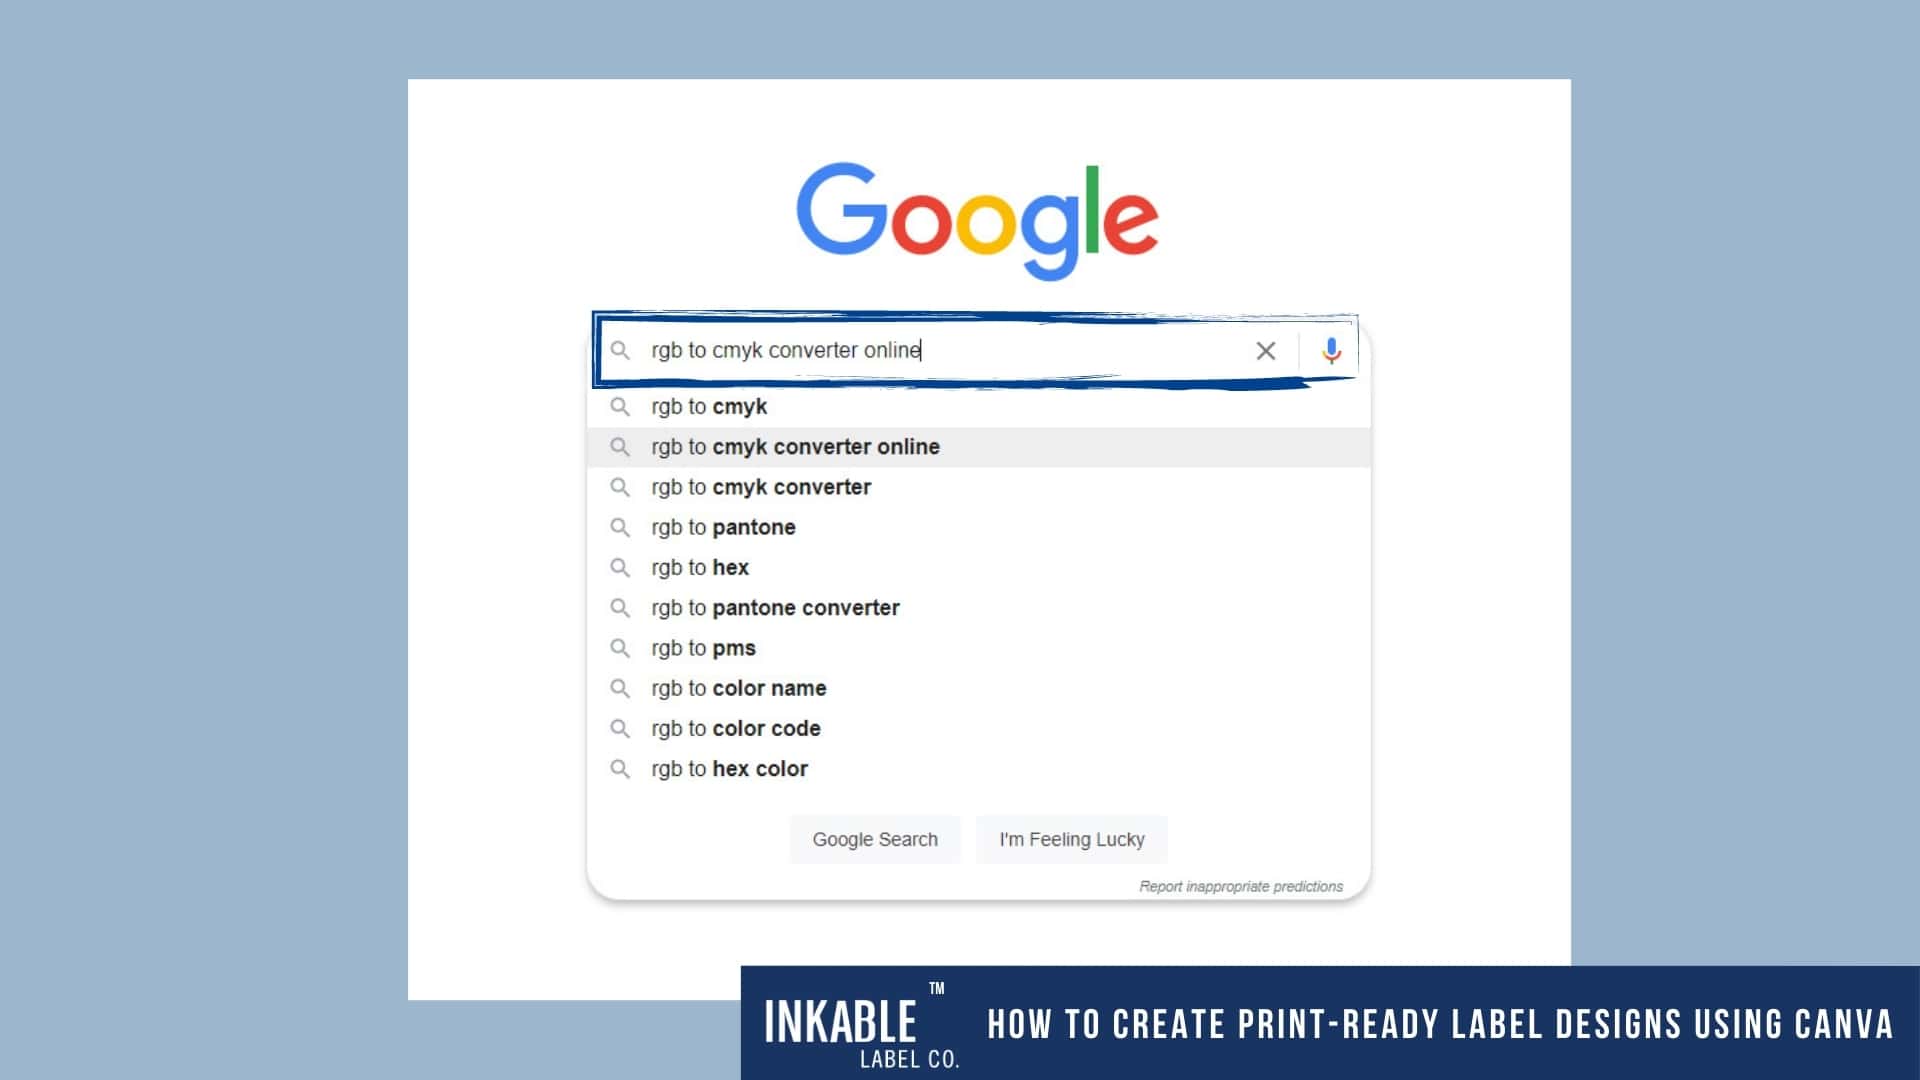
Before sending your design to us, you may quickly convert them to CMYK using an online CMYK conversion tool. Though we can convert your files from RGB to CMYK, it’s best to do so ahead of time so you can double-check for any color or formatting changes.
Branding materials need colors to be consistent across all print collaterals. This makes sure your business comes across as professional and polished. To make sure you get precise (and not just accurate) colors, we recommend looking at PMS colors.
- Contact us for a free file checkup and free assistance in setting up your PMS colors.
5. Check Your Fonts
If you have text, you will usually need to convert them into outlines.
Otherwise, the content may display in a different font or not at all when the file is opened. Canva, on the other hand, does not allow you to outline typefaces. Don’t be alarmed! Canva primarily employs Google fonts, which are available for free download.

Please make a list of all the fonts used in your design and inform us of their names when you make your purchase. We can download the typefaces and outline them on our own, however this isn’t the most efficient way.
6. Don’t Forget to Keep it Vector!
In design, vector refers to components such as text and forms that have been made with outlines.

Vector designs print considerably more clearly than images. They aren’t resolution-dependent, which means we can make these designs bigger or smaller without losing any resolution.
Keeping everything in vector ensures you get crisp and sharp prints every time you use this kind of graphic. Keep those vector components intact while creating in Canva (you may still alter colors to your heart’s desire).
7. Remember to Save and Download in the Right Format
Always save your work as a layered PDF file for files that are meant to be printed.
Changing your mind is ok, especially if this means you are refining your custom packaging artwork to be its best version possible.
In cases like these, we want to keep the file as easy to manipulate as possible. The only way to do this is to make sure you save your Canva file as “PDF Print” that is in a multi-page document format.
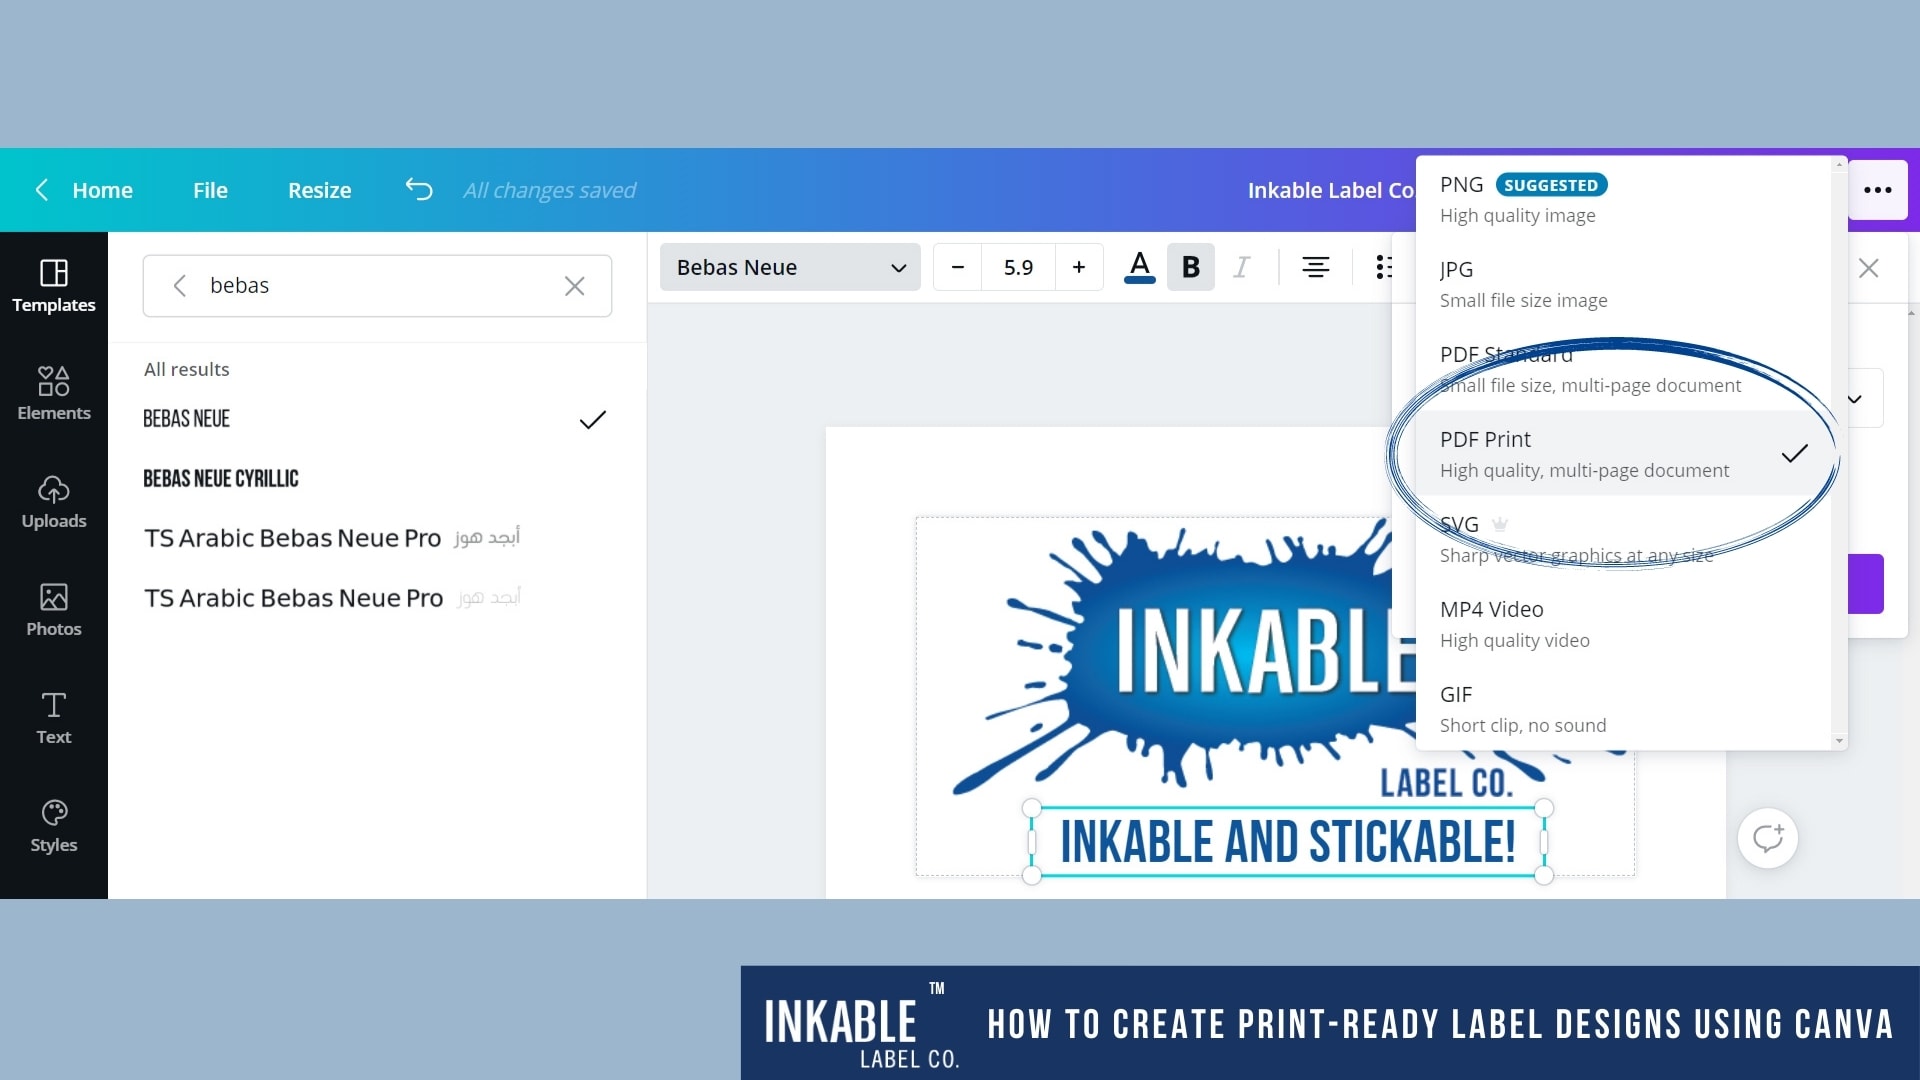
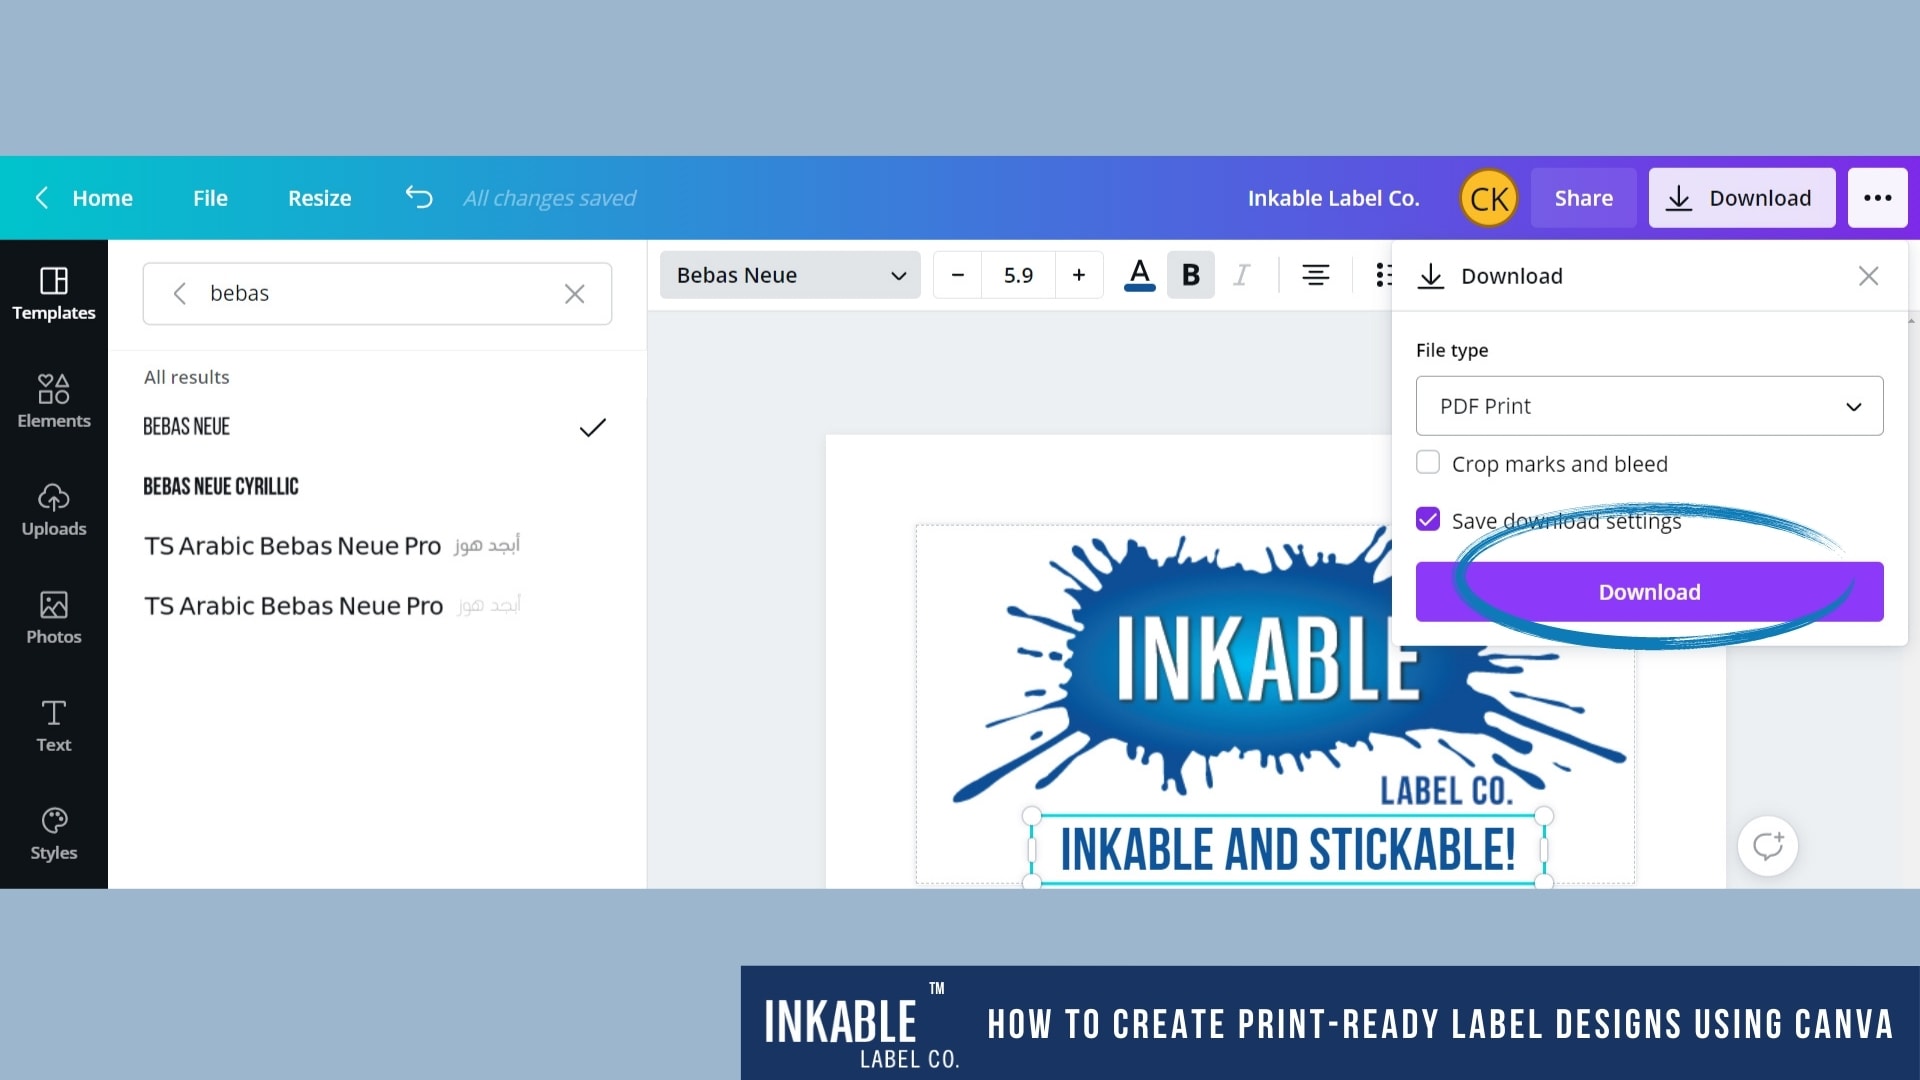
When you’re ready to download your unique label design, save it in this format to retain the vector components so any Prepress designer is able to do adjustments afterward.
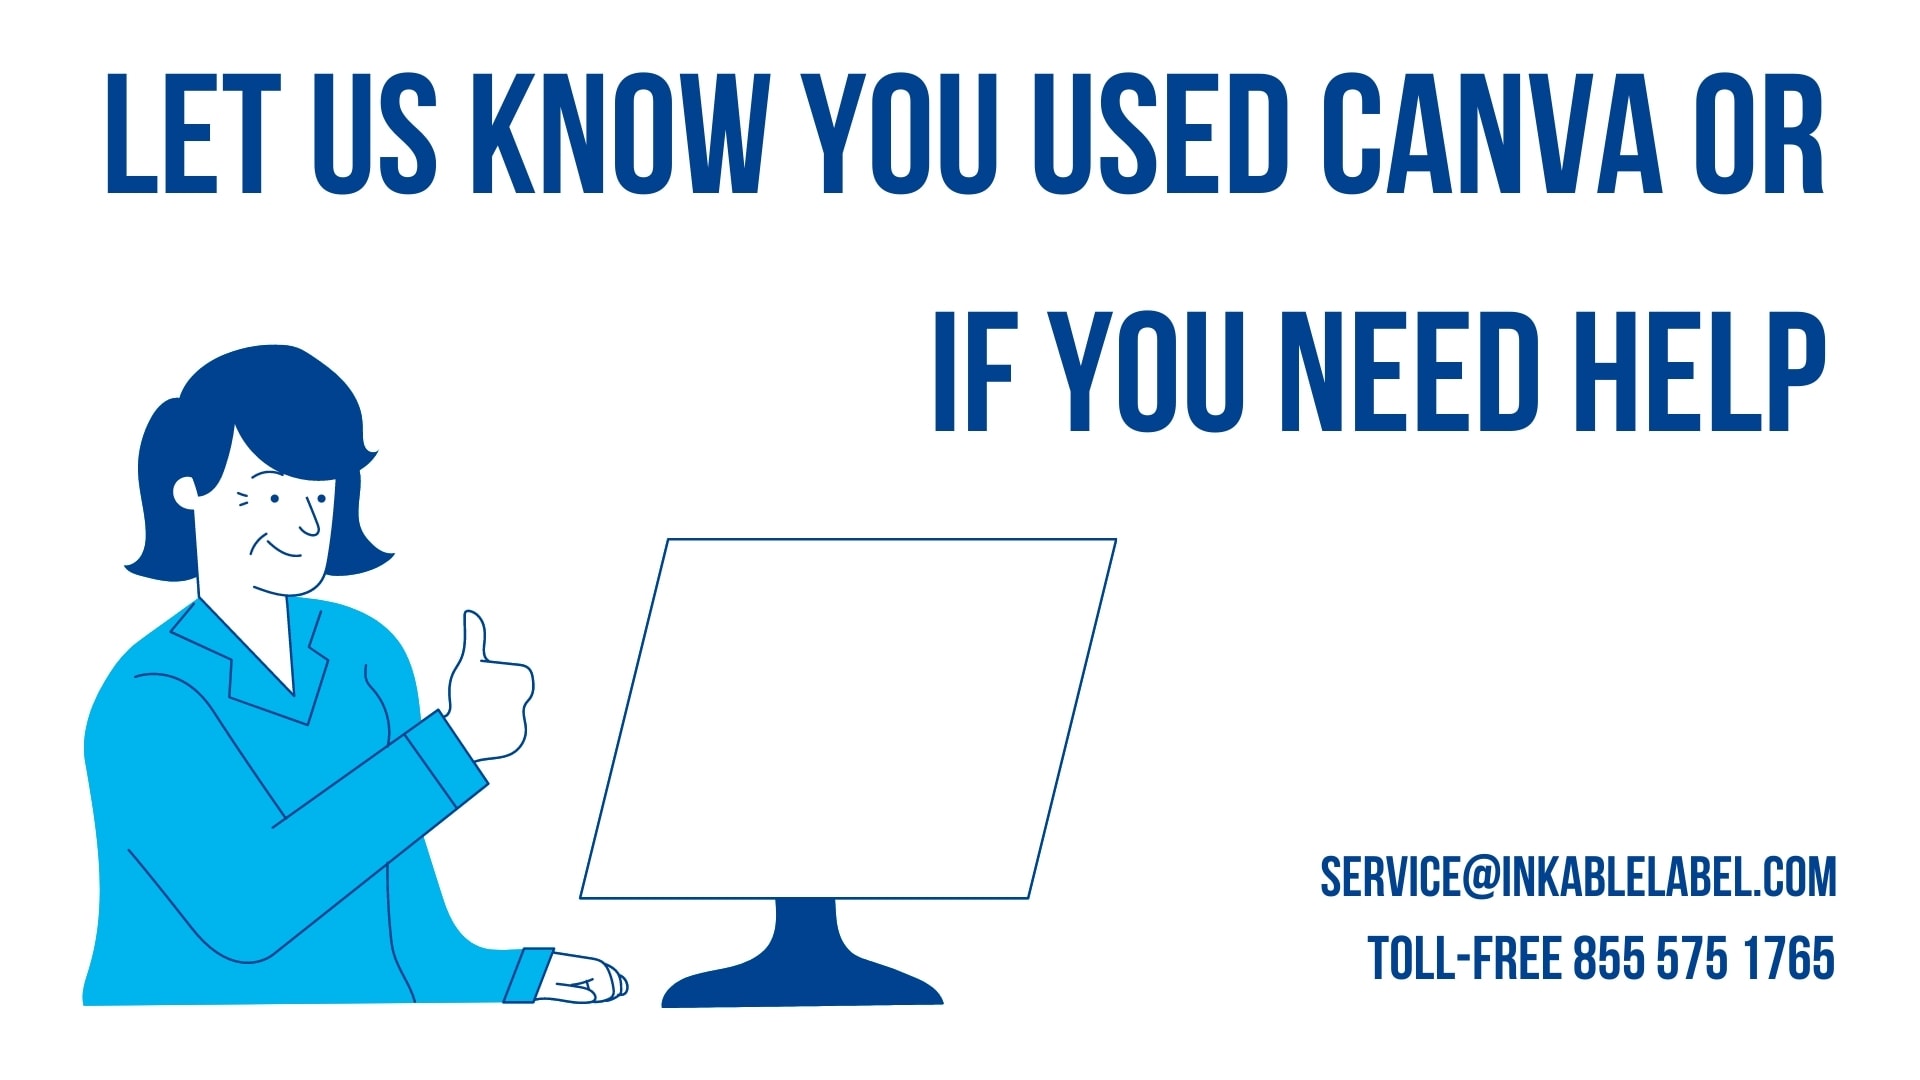
Giving us a heads up is the easiest way to guarantee that we provide the best service possible for you. When you upload your print design, let us know you’re using Canva.
Knowing your design was created in Canva can help us figure out what to look out for and how to deal with your file most effectively.
You would still need a Prepress designer to double check everything to make sure your files are 100% ready for press. When it comes to artwork however, it is always empowering to be able to have more control over the final packaging look by being able to create your label designs yourself.
We hope this post was helpful in showing you how to create print-ready designs in Canva.
If you know of an easier way to do this and would like us to include more information, let us know! We strive to update our resources based on your valuable feedback.